How To Stencil A Concrete Floor
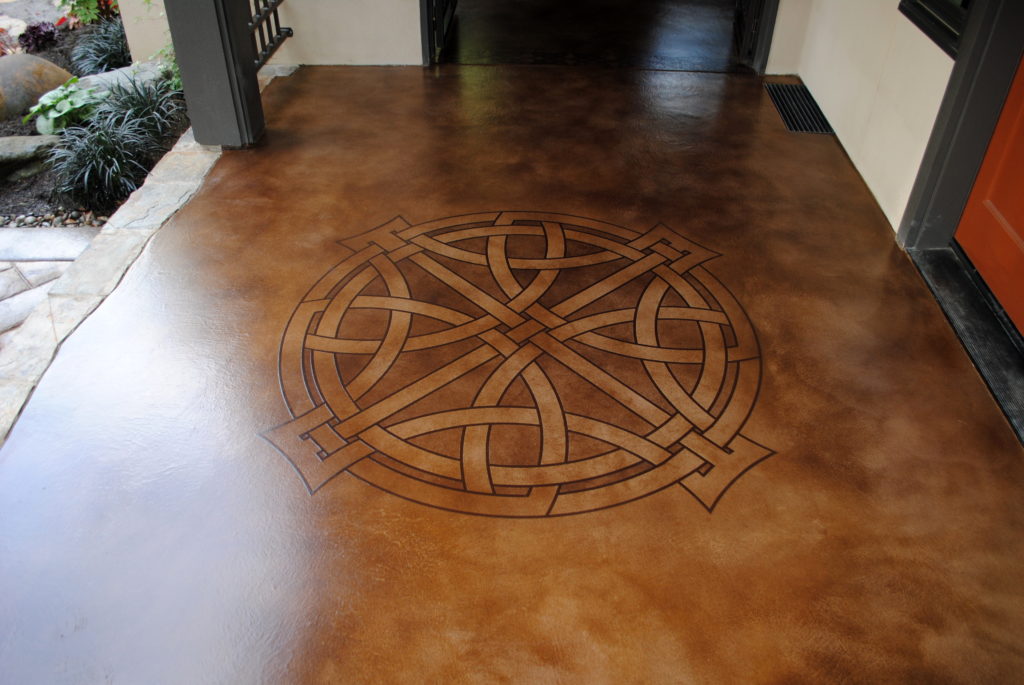
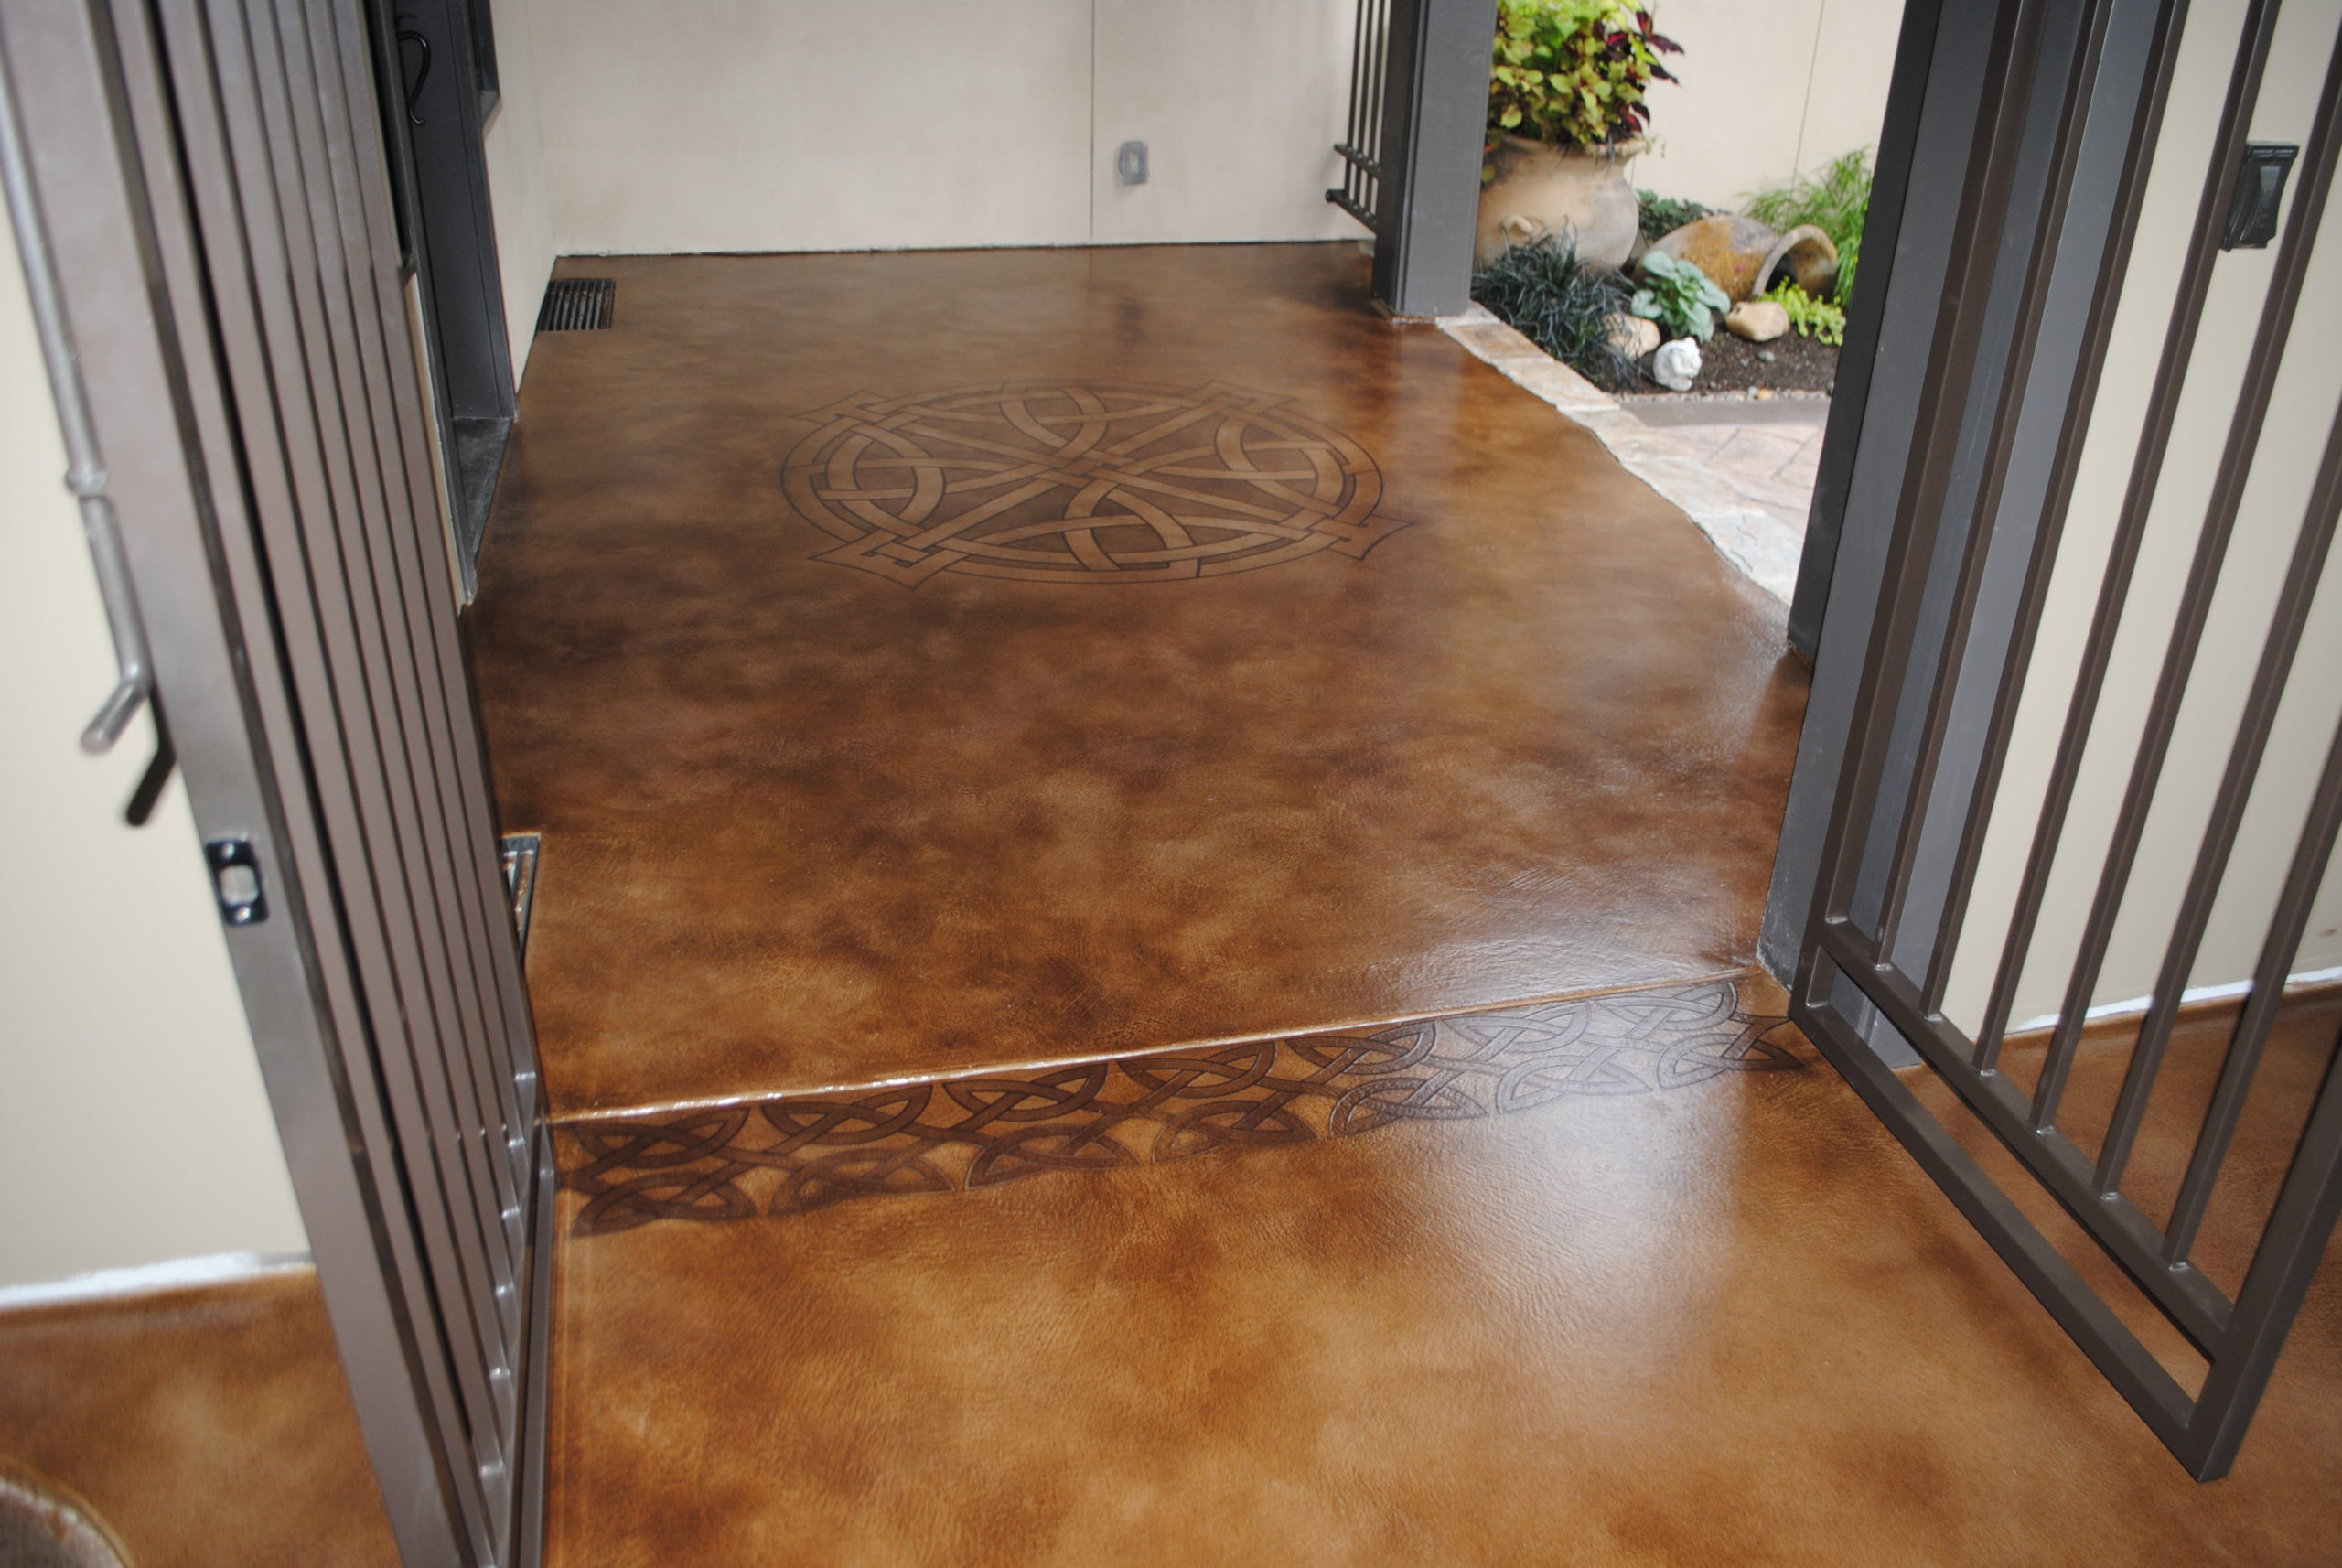
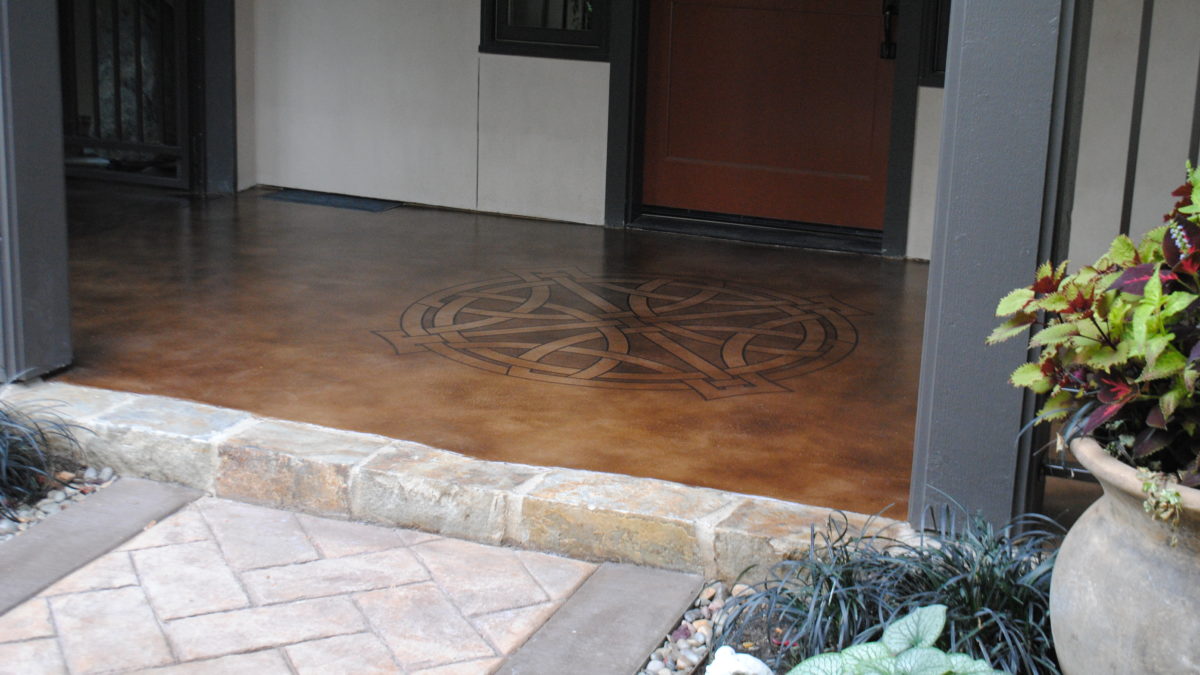
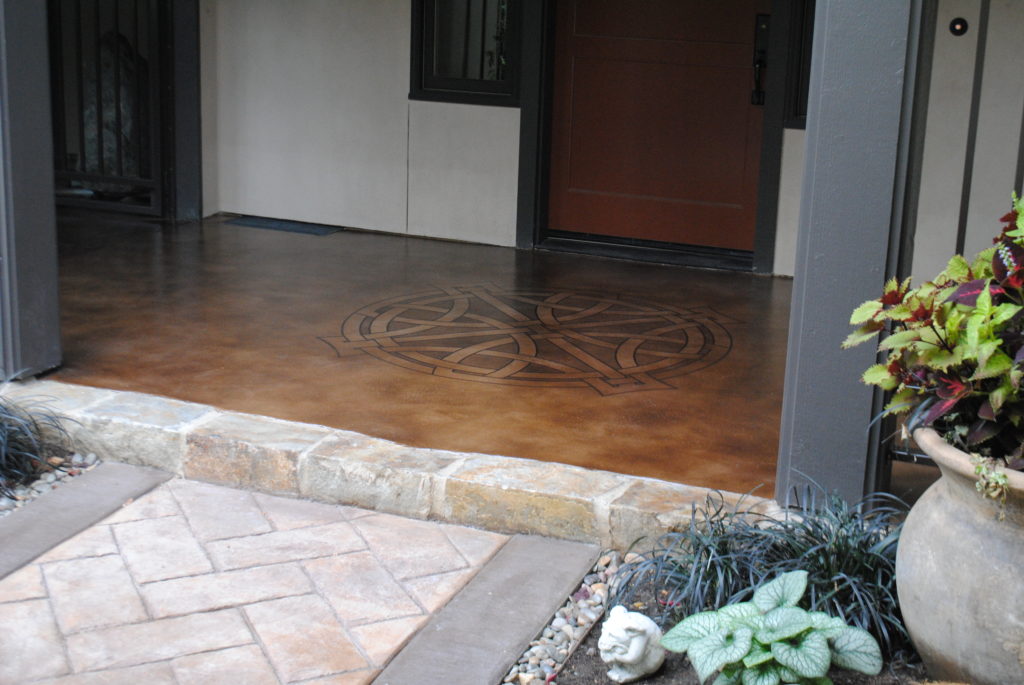
There are a multitude of options for decorative concrete. One of the easiest ways to make a dramatic statement is with the use of stencils. We were recently contacted by a contractor and homeowner who were looking to finish a front porch and outdoor fireplace room. The two concrete slabs were poured at different times. This can cause issues with coloring since each slab could possibly take stain differently. We opted to do a micro-topping over the whole surface. This gave us a fresh canvas to start with and uniform color over the entire area.

We ground the entire slab in preparation for the micro-topping. We then troweled a course coat of micro-topping with an integral color. This was followed by a smooth coat of micro-topping with a lighter integral color to add variation and visual interest. Once dry, we sanded the entire floor. It was then vacuumed really well to remove as much dust as possible to ensure our stencil would adhere.
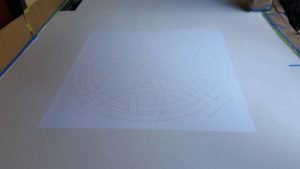
We got our stencils for this project from www.floormapsinc.com. The client chose a large round celtic design for the entry and a smaller border stencil for the doorway between the porch and fireplace room. The stencils were laid out on the floor, and secured in place with blue tape. The tape is placed to hold the center point while half of the stencil is secured.
To do this, the stencil is folded in half. The backing is carefully cut. Then from the secured portion, the stencil is slowly pressed to the floor while the backing is slowly pulled out. This will require two people unless the stencil is really small. Use a plastic putty knife to carefully burnish the stencil to the floor as the backing is removed. Work slowly and evenly across the entire stencil pressing out any bubbles and making sure it is completely adhered to the floor. Only remove a small portion of the backing at a time, while holding the stencil off the floor until the person burnishing it down can secure it. Once the first half is completed, the same process is used to secure the other half.
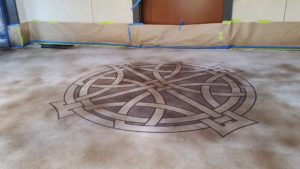
Before proceeding inspect your work carefully to make sure everything is tight to the floor and that there are no air bubbles. The stencil was double cut in this application to allow a two tone effect. We removed the top protective film, which left us with the ¼” border exposed. We integrally colored a super fine micro-topping to a dark chocolate which matched the wood trim. This was troweled over the stencil to evenly fill the ¼” border area and to provide a slight height difference and visual interest. After the micro-topping was dry, we removed the second cuts of the stencil exposing the areas that would get stained darker than the main floor. We sprayed these with a water based stain using an HVLP gun.

The stencils were removed once the darker stain was dry. The area where the stencil was applied was lightly sanded to prevent any adhesive residue from altering the main floor color. We then colored the entire floor with three different shades of water based stain, again using an HVLP gun. We applied a primer and a urethane top coat once the stain was dry. The end result, is a visually stunning entry with detail that would be difficult to achieve any other way.
For more information on stencils or any of our other services, please contact us to see how we can help with your upcoming project.