How to Install Concrete Floors Over Plywood Sub-Floors
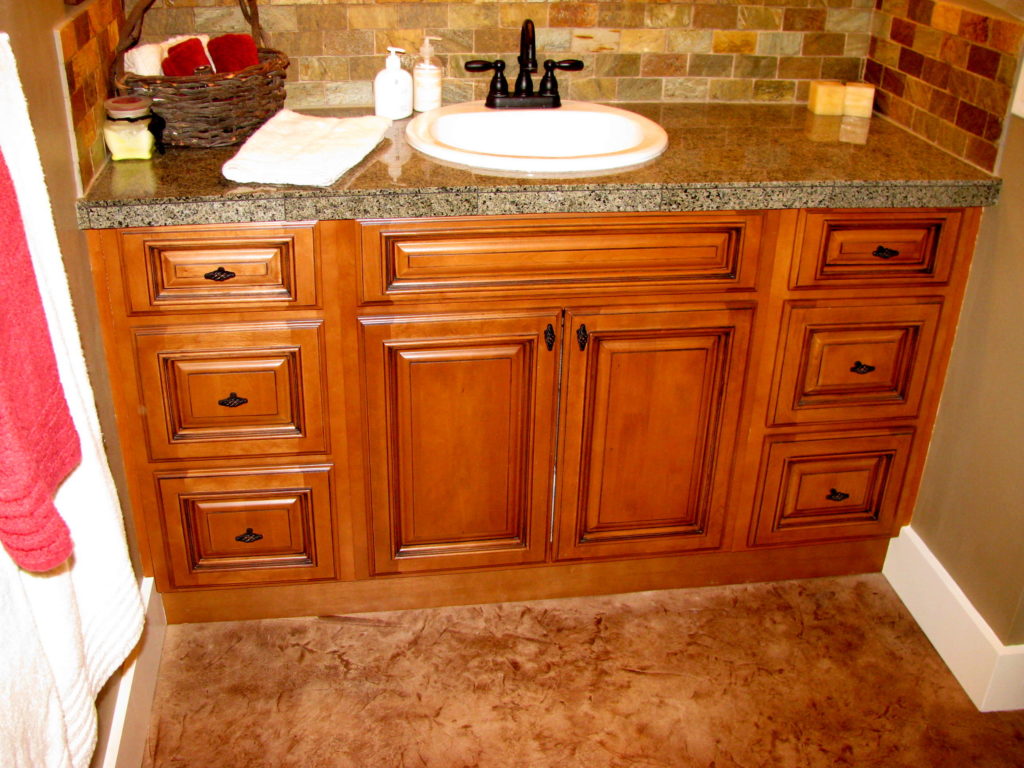
The popularity of decorative concrete on the rise. Many remodelers feel like it isn’t an option for them simply because they have plywood sub-floors. They think they are stuck with traditional flooring choices like tile, carpet, linoleum, or hardwood. Many old school contractors would tell you the same thing. This is simply not the case. If you are looking for the beauty and personalization available in decorative concrete flooring, you can absolutely achieve this look. And it can be done with an installation over your plywood sub-floor without any compromises in quality.
In the past, there were many obstacles to overcome to make this type of installation work. You would have to put down about four inches of concrete to get a floor that wouldn’t crack and crumble. If you were trying to butt up against any other types of flooring, there would always be issues with the transitions. Anywhere that had low ceilings or standard door openings was ruled out, as they would become too low. In most cases, the weight of the material alone would prove more than the structure itself could handle. This ruled out almost all applications.
In recent years, products have been developed that can be applied considerably thinner without losing any structural integrity. Now just about any type of decorative concrete floor can be installed over wood sub-floors. And these installs can be done at a thickness around ½” to ¾”; the same as most traditional flooring types.
Before starting any installation you first want to inspect the integrity of the sub-floor. Any loose boards should be refastened. Securing the entire area with screws is a good idea. Most nailed down sub-floors would allow for more movement and increase the possibly of the finish floor cracking. Older homes with smaller joists sizes may not be good candidates, as they would allow more movement and be more likely to crack over time. Most newer construction homes should have adequate joist sizing that is 16” on center and plywood that is sufficient to support the material.
After the sub-floor has been secured, sand the surface with 60 grit sandpaper to remove contaminants and create a profile for the new material to bond to. Once the sanding is complete, vacuum to remove all dust and loose debris. Depending on the product you want to use, a primer might be required before the base coat. Once the floor is clean this primer would be installed according to the manufacturers specifications. When the primer is ready for re-coating, staple down galvanized metal lath. You’ll want to overlap all joints by at least two inches and use around 25 staples per square foot. You may also want to put additional staples into the framing members below the sub-floor to make sure it is secure.
Now you are ready for a base coat or fill coat. This is similar to a scratch coat in stucco installations. Trowel your material to just barely cover your metal lath. A self-leveling material may make this easier, but you should have some familiarity with this type of work to get the best results. Once the base coat is ready to re-coat, you can install the decorative coat. This can be a integrally colored micro-topping or one you can stain or dye, a stamped concrete overlay, a decorative epoxy, or just about any other type of decorative finish you desire.
Once the decorative coat is dry you will need to protect it. There are many options available depending on the type of decorative product used. A very important consideration is how the space is going to be used. A space with only light foot traffic wouldn’t require the same type of protection as a commercial space with heavy foot traffic. You will at the very least want to use a floor wax, but more common are acrylic sealers and polyurethanes. Polyaspartic polyureas are gaining popularity due to their high durability, low VOC’s, and quick cure times. These allow spaces to be returned to use much quicker. Once your top coat is dry, you can begin enjoying your decorative concrete surface.
With so many options available in decorative concrete, you can easily create a personalized floor that will wow everyone who sees it. Since installing decorative concrete over wood sub-floors is a relatively new process, it also tends to surprise people. You can now create floors that are not only unique in color and style, but are unique to the space they are installed in. If you are looking for that one of kind type look, and thought it wasn’t obtainable in flooring, perhaps you need to consider decorative concrete?
We would love to hear from you on this or any other decorative concrete topic.

Related Posts
Categories
- Acid Etch (2)
- Acid Stains (1)
- Acrylic (1)
- Basement Flooring (5)
- Broomed Overlay (1)
- Commercial Flooring (15)
- Commercial Kitchens (4)
- Concrete Dyes (5)
- Concrete Resurfacing (17)
- Decorative Concrete (16)
- Decorative Concrete Coatings (16)
- Designer Epoxy Flooring (5)
- DIY Epoxy Kits (3)
- Embedded Logos (2)
- Epoxy (15)
- Epoxy Broadcast Floors (1)
- Epoxy Coatings (7)
- Epoxy Flooring (6)
- Epoxy Floors (6)
- Epoxy Mositure Barrier (4)
- Epoxy Paint (4)
- Featured Post (6)
- Flexible Epoxy (1)
- Fluid Applied Floors (3)
- Food Processing (2)
- Garage Floor Coatings (7)
- Hand Troweled Floors (1)
- Hot Tire Pick Up (2)
- Integral Cove Base (1)
- Loading Docks (1)
- Metallic Epoxy (5)
- Metallic Marble Stains (2)
- Micro-toppings (10)
- Moisture Mitigation (2)
- Plywood Sub-Floors (1)
- Polyaspartic (9)
- Polyurethane (7)
- Seamless Floors (13)
- Spray-on Overlay (1)
- Stained Concrete (5)
- Stamped Concrete (4)
- Stencils (3)
- Thermal Shock (1)
- Uncategorized (3)
- Urethane Cement (3)
- Water Damage (1)
- Waterproof Concrete Decking (1)


